Why a photocell?
Have you ever walked around your home during the late evening or middle of the night and wished you had some light? Just enough to reach the nearest light switch? Or maybe just to illuminate your path to get down the hallway to the bathroom? You can achieve this by installing a photocell switch, allowing the lights to go on and off with the light from the sun.
What is a photocell?
A photocell is a sensor that detects light, commonly called dusk to dawn switch. The sensor picks up on the availability of light and will direct power to the lights when less light becomes available. These sensors are great for putting in fixed night lights, outdoor lights, and any other application where you would only want the lights on when it is dark. Not to mention, think about all the savings you can have by not accidentally leaving a light on!

How to make the connection
Like most switches, you will have a power in and power out, AKA your line and load. Now on a photocell sensor, it will look different than your standard switch, or even a 3-way switch. Most of us are used to seeing the terminals and wiring them up accordingly. On a photocell, you have wires preinstalled instead of the screws you would typically fasten your appropriate wires to.
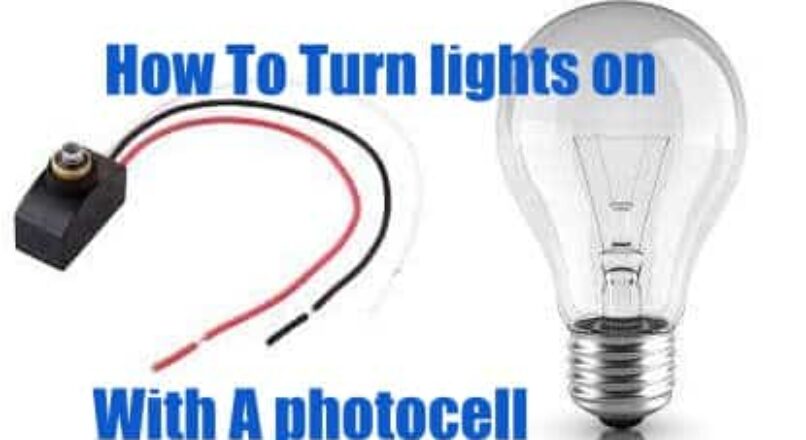
On the photocell, you will find the white, black, and red wire. While this may seem confusing and overwhelming at first, don’t worry it’s actually quite simple.
The first thing to do is turn off the breaker for the circuit you are working on! Once that is done you can start playing with all of your wires.
Now for the fun part
Now locate all of your ground wires. Splice these all together, wire nut them, and push them into the back of the box. The whole idea to make it easier on yourself is to eliminate the mess of wires that you’re looking at. This should make it much easier to see what you have going on inside the box.
Now go ahead and grab all the white wires you have in the box. These are your neutrals. Tie them all together INCLUDING the white wire that was preinstalled on the back of the photocell.
Now, look at the box. Things are getting pretty simple now, aren’t they?
Locate the black wire that is supplying your power. The best practice would be to mark this wire before you added the wires connecting to your lights, but if you didn’t, you can flip the breaker back on and test for which black wire in your box is supplying the power.
So, the black wire that is supplying your power, will be tied to the black wire on the back of the photocell. This is VERY important that you attach the appropriate wires together. The last thing you would want to do is accidentally attach your line (power in) to the load (power out) side of the switch. While it may work at first, it will damage the switch and you will be doing this all over again.
Once you have your grounds tied together, your whites (neutrals) tied together, and your black (power in) wire attached to the black wire from the photocell, you are ready to tackle the red wire.
Now, you should be left with one red wire coming from the photocell and some additional black wires left in the box. Simply attach the black wires ( that should be running to your lights) to the red wire.
That’s it. You’re done wiring!
Just carefully push the wires into the box and screw the plate to the box. Flip the breaker on and the lights will come on. Depending on your switch they will stay on for a few moments before turning off. Cover the photocell to ensure that they indeed come on when it detects no light.
Now you can sit back and enjoy your lights in the evening, night, and early morning without ever touching a switch! Let the sun do the work for you.
Watch the video below for a more hands-on tutorial of just how easy it is to install your own photocell sensor.
Comments ( 2 )
I only have three wires in my box… white black and bare(ground)… My switch has a white, black, red and green. How would i wire this?
Hmm, do you mean you have theses wires connected to your switch?